


Manage Cart
The cart function behaves similarly to that of an e-commerce system; it can be accessed from the navigation panel on the left, where are available both the cart contents and the cart management functions. The cart can also be accessed from the cart icon on the right side of the top bar, which will open the Manage cart page.
The Manage cart page offers two quick action buttons in its top right corner: Add samples (to manually add samples from the samples' Grid) and Empty cart.
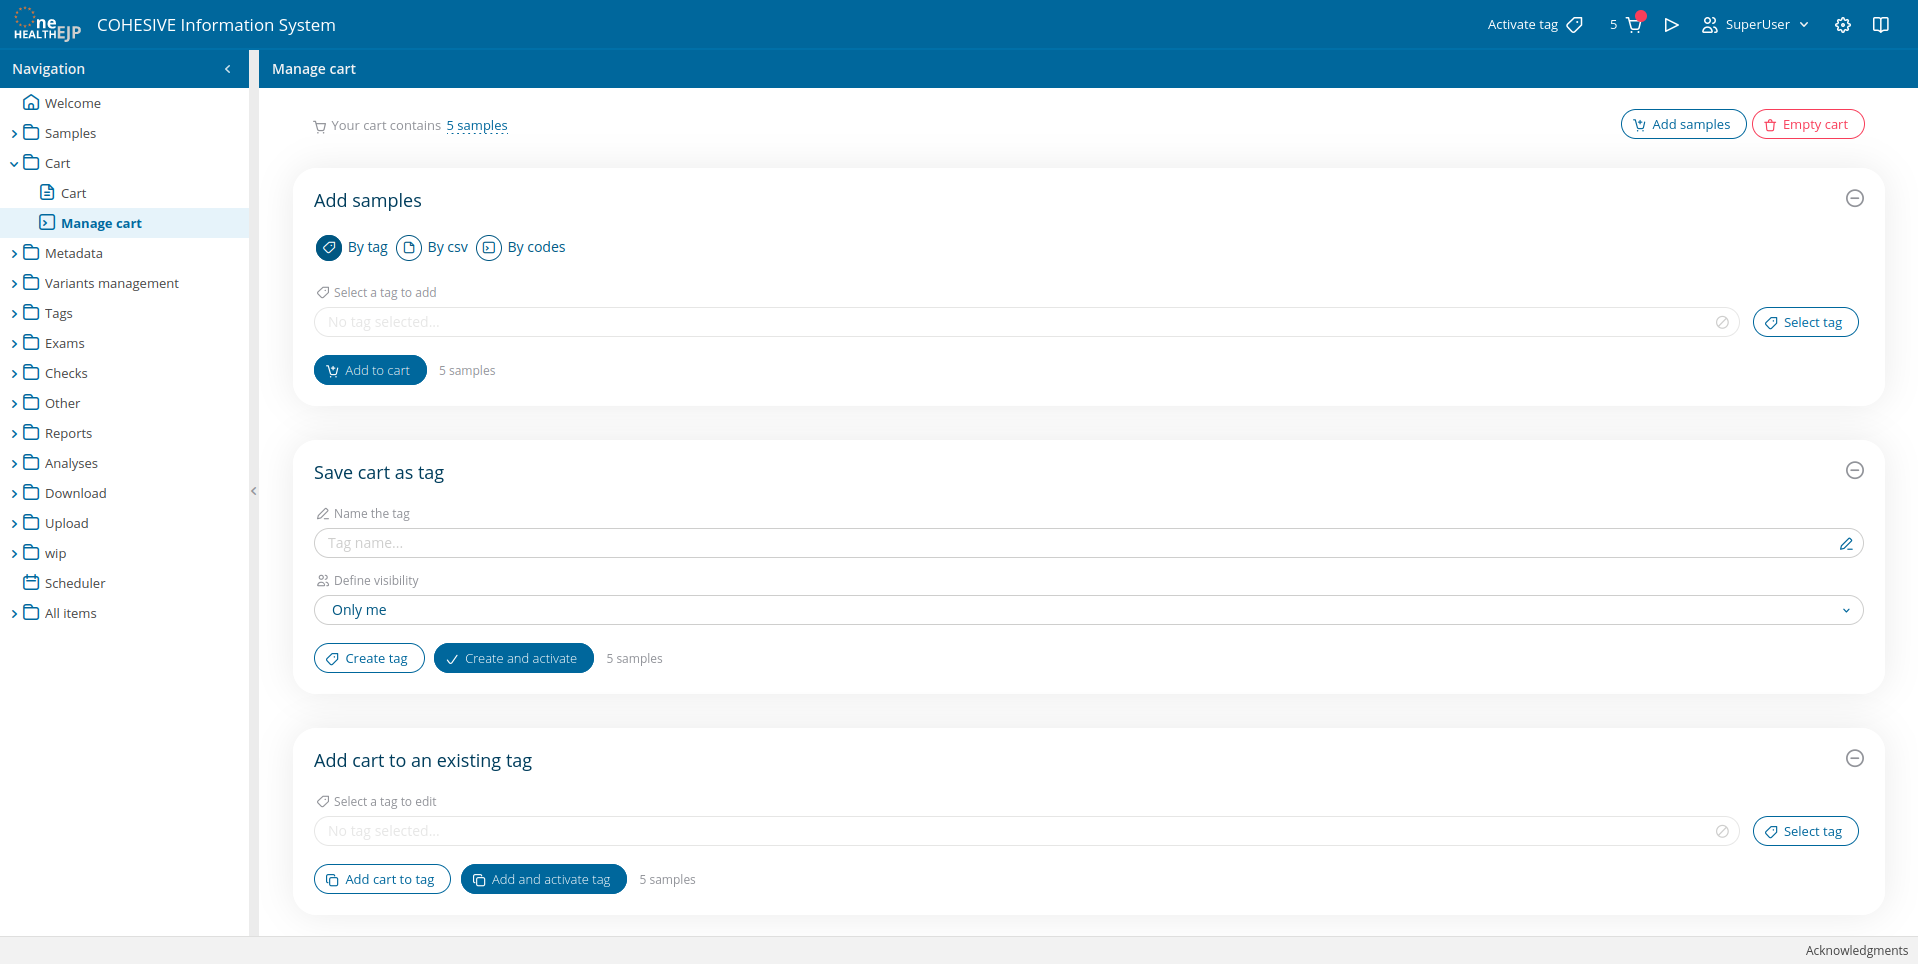
The cart's three main functionalities are grouped into three expandable cards: Add samples, Save cart as tag and Add cart to an existing tag.
Add samples
From this card it will be possible to edit the cart by adding samples to it in three different ways: from a saved tag, from a csv file or by directly typing/pasting sample codes separated by comma in the "Write codes" field.
The selection of any of the three modes will update the card's view with the options and fields available for the selected mode.
Save cart as tag
This card will allow you to create a new tag directly from the samples contained in the cart. To know more about tags please visit the dedicated section or dive into the new functionalities available for tags in the Manage tags page.
The following short video demonstrates how to save a cart as tag for future use.
Add cart to an existing tag
The last expandable card empowers the user with the ability to add samples currently in the cart to an existing tag. To know more about tags, please visit the dedicated section or check the tags functionalities in the Manage tags page.
The following video will show the simple action of adding samples in the cart to a specified tag.
